Sunday, June 9, 2013

Automated online backup using FTP

I host my website on a hosted server with no shell access (I know it is pretty lame, but cuts down on my cost) and until I don't I have my server running with a Public IP address this problem will remain a problem.

Adding to this is the feature request that I get from others and myself to put some of the content from work/research away from the computers, somewhere in the Cloud. Since people have not gotten over the paranoia about Dropbox, and I too do not recommend them it, FTP way to hosted server is a sensible solution.

In case of a VPS, with shell access on the server a simple 'rsync' would do the job and crontab (one of the most beautiful pieces of software, ever) makes it a habit for the computer to do it as a routine.

Since all these are not happening, and simply because I do not have shell access to the server, I started looking at FTP as an option. Of course, FTP ain't secure, but I haven't yet worked the SFTP out. If one of you does it, do post it as comment.

Here's the script that will be automated using crontab.

#!/bin/bash
username="ftp_user@server"
domain="server"
password="ftp_user_password"

#Getting hold of current date in mm-dd-yy format to append to the backup
date=$(date +"%m-%d-%y")
#backing up a folder to upload
tar -cvzf /home/raghav/backup.tar.gz /home/raghav/backup/ 

#Here's the FTP portion of the code, which runs without interaction

ftp -n <<EOF
 verbose
 open $domain
 user $username $password
 put ~/backup.tar.gz $date-backup.tar.gz
 bye
EOF

Save this as ftp-backup.sh, or anything that makes sense to you. 
Test this code, and of course after making necessary changes with your FTP user name, password and folder to be backed up.

Change permissions, and making it an executable. Use 'chmod a+x ftp-backupto make it executable, and test it. If the script is working and has left a copy of the back up file on your server, now make it a routine task by making a crontab entry.

raghav@debian:~$ crontab -e

And make the following entry in your crontab, to run the backup script ftp-backup daily at 5PM
0 17 * * 1 /home/raghav/ftp-backup


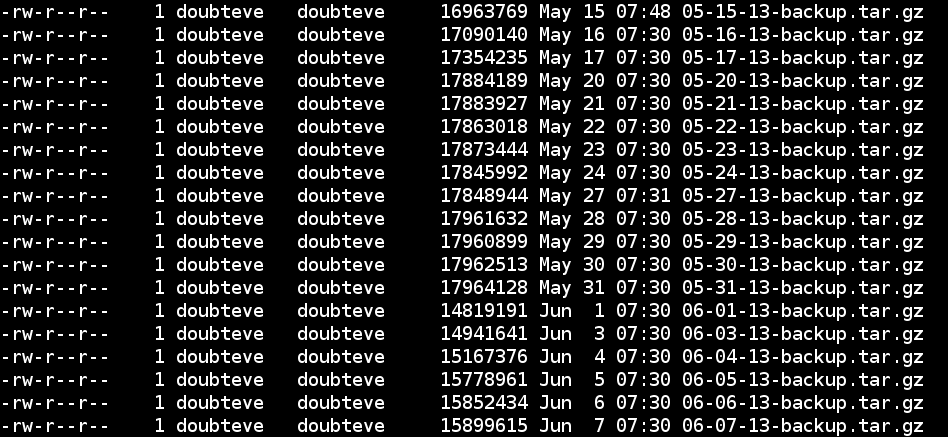
Here's the daily backup (Except for on Saturday and Sundays) dumping archives to my FTP server.


Sunday, May 26, 2013

My date with the Mighty Savanadurga


by Monisha M Ganesh
19-05-2013
It was a cold pleasant morning, when I set out for what was supposed to be my first ever trek. I was going to scale the mighty Savandurga hill. I knew it was going to be really very exciting and quite naturally was curious about it. The day looked promising. It was not just another normal day.

I reached Kempegowda Bus Terminus at around 7 a.m., and the crowd there did not interest me this time. Any other time I would’ve landed in K.B.S., the never ending crowd and the fleet of buses waiting there would’ve crossed my mind. But that day, I was on a mission. I was not bothered about anything other than the trek. I knew, I would meet different people from different zones and make new friends all through the trek and the very thought, made me happy. Once a few of us gathered at the Majestic Bus Terminus, we proceeded with the trek.

As we began our travel, the weather and the scenery around were enthralling. It was as if the trees and the plants there were greeting us. At the end of the journey to Savandurga, all the unknown people were well known. Standing at the foot of that gigantic Savandurga hill, we looked like Lilliputians. For a minute I just wondered whether we could make it to the top. Without any further delay, we started the trek.

Every step motivated us to reach the acme of the hill. As I was climbing, a look backward scared me at times. But I was so keen on moving ahead that I did not bother looking behind. We took short breaks on the way. The sweet lime which I am not really very fond of, tasted the best at that time. Apart from the casual talks, it was the glucose powder that egged us on. As we were scaling a dry peak, the very sight of water made us go crazy. 
 
After two hours of exhaustive trek, we finally reached the pinnacle of the peak. I got a different view of the World from up there which I had never seen before. I wished I could make the time pause right there. Once we settled down there, and then began the most important phase of our trek. We had actually gathered there to discuss about the summer camp which is scheduled to take place in the month of July. Then it was time for some general discussions. Most of the speakers there instantaneously spoke on few general topics which later led to discussions. An hour passed by. Even though we did not want to leave, it was time. The discussions there were a preview of what could be expected at the summer camp. The enthusiasm level just shot up. I walked down hoping to experience another fun filled trip soon. And at the end, the day was way better than I expected it to be. I went back home with another memorable page ready to be penned down in my diary.


Sunday, March 31, 2013

How to change file upload size in phpmyadmin!

For lesser mortals in the universe of databases, who still inadvertently use lot of MySql, a tool like PHPMyadmin is the holy grail!

This web browser based, php querier accesses MySql tables and also gives tremendous functionalities to tinker with the databases. While most of it is intuitive, sometimes a small feature requirement needs the options beyond the defaults.

Before I delve into these non-default configurations, just for the record, here is how you get your phpmyadmin to access your mysql tables on your Debian based machines.

fsmk@gnu:~$ sudo apt-get install phpmyadmin

Once, you have installed, as a dependency Apache also gets installed. To access phpmyadmin, open your favourite web browser and type on "http://localhost/phpmyadmin"

Now, that settled let me get into the issue of the post.
SQL backup, taken from different servers or simply for the purpose of backing up data are the most precious files on my computer, at least. Now, to move in and out of different machines with the mysql data, phpmyadmin offers a cool import/export option.

While export is flawless, import has a default option which restricts the maximum file upload size to 2M. Once you encounter sql's which are more than 2M you know you are handling quite a lot of data, and in such cases how to restore these >2M files?

The configuration file for the phpmyadmin which checks this option is a php.ini file, which resides in the /etc/php5/apache2/ directory.


Get hold of this file, and search for "upload_max_filesize" in the php.ini file. After you've got it change it to whatever that your maximum file size might be.
Restart your apache service to upload those massive sqls into your database.

Sunday, March 17, 2013

Embeding long tables in plain HTML, using Libre Office

When using plain HTML for design of web pages, and there aren't any WYSIWG editors, and there is an inevitable requirement to embed tables into the HTML file, the <table> tag is quite handy.

<table border="1">
<tr>
<td><b>Movie</b></td>
<td><b>Favourite character</b></td>
</tr>
<tr>
<td>The Matrix</td>
<td>Neo</td>
</tr>
<tr>
<td>The Lord of the Ring</td>
<td>Eragon</td>
</tr>
<tr>
<td>V for Vendetta</td>
<td>Ivy</td>
</tr>
</table>

Will result in


For a table with couple of entries and default options, this syntax follows, and is adequate.

But, when one has to embed a longer table, with many more rows and columns and don't ask me why! Just in case, you find yourself in such a state that you have a complete table existing already in your document or spreadsheet and you do not have the patience or the in-aptitude to type out all of it using the syntax shown above, Libre Office (or even Open Office) comes to rescue!

Copy the entire table that you want to embed in a HTML file, and paste it into a new HTML document that you can create from the Libre Office prompt. Once you are done formatting your new table in a Libre Office HTML file, save it as a .html file.


All you now have to do is, locate the new .html file you created using Libre Office and open it with your favourite text editor!

It is a HTML file now with all the taggings done for your table, which otherwise would have taken painstaking hours of labour to reach that form! Copy-Paste the HTML code into your webpage that you started off wanting to embed a table.
It's ready!

Libre, set me literally free this time!

Happy hacking!
PS: Of course there might be better methods to accomplish this, if you do have one please post it as a comment :) 

Tuesday, March 12, 2013

Find,replace in multiple files using BASH

Another of those zillions of tweaks that I am afraid will slip out of my head! So jotting it down here.

When you are editing HTML files, or some similar content template with multiple changes to be done in a huge number of files, it is simply excruciating to dig into each of the files and search for a pattern and change it.

For instance, if you have a host of html files, and you need to maybe make one common change in all files, the simplest thing to do is use the power of BASH!

To change a string, recursively in multiple files, use the following command.

raghav@fossphosis:~$grep -rl 'old-string' ./ | xargs sed -i 's/old-string/new-string/g'

'grep' as always performs pattern matching
'sed' is used as the stream editor

Old-string is the string to be changed, into new-string.

May the power of BASH be yours!
GNU Rocks.

Monday, February 11, 2013

Installing additional packages in GNU Octave

 Guest post by Sneha Das, BMSIT, FSMK

Octave is a versatile computational tool, with multi-faceted functionality. To make the fullest use of this tool, there are various packages that needs to be installed. The packages in octave are equivalent to toolboxes in matlab.

To install octave packages

  • If the desired package to be installed is available in the ubuntu repository, then
    - open the terminal
    - type 'sudo apt-get install octave-name; name is the name of the octave package. If the
    install is unsuccessful, errors appear in the terminal. Else nothing appears.

If the package is not there in the repository
  • Download the package's .tar.gz file from http://octave.sourceforge.net/packages.php
  • Don't extract the .tar.gz file.
  • Open Octave by typing 'sudo octave' in the terminal.
    - the working directory should be the directory where the file is stored.
    So type 'cd directory' to change the working directory.
    - Then install the package by typing the command 'pkg install name.tar.gz'